
Most people track crypto in a browser tab or on a phone. A desktop app is a different trade: the window stays open on a second monitor, prices update while you work, and nothing you own lives in someone else's database.
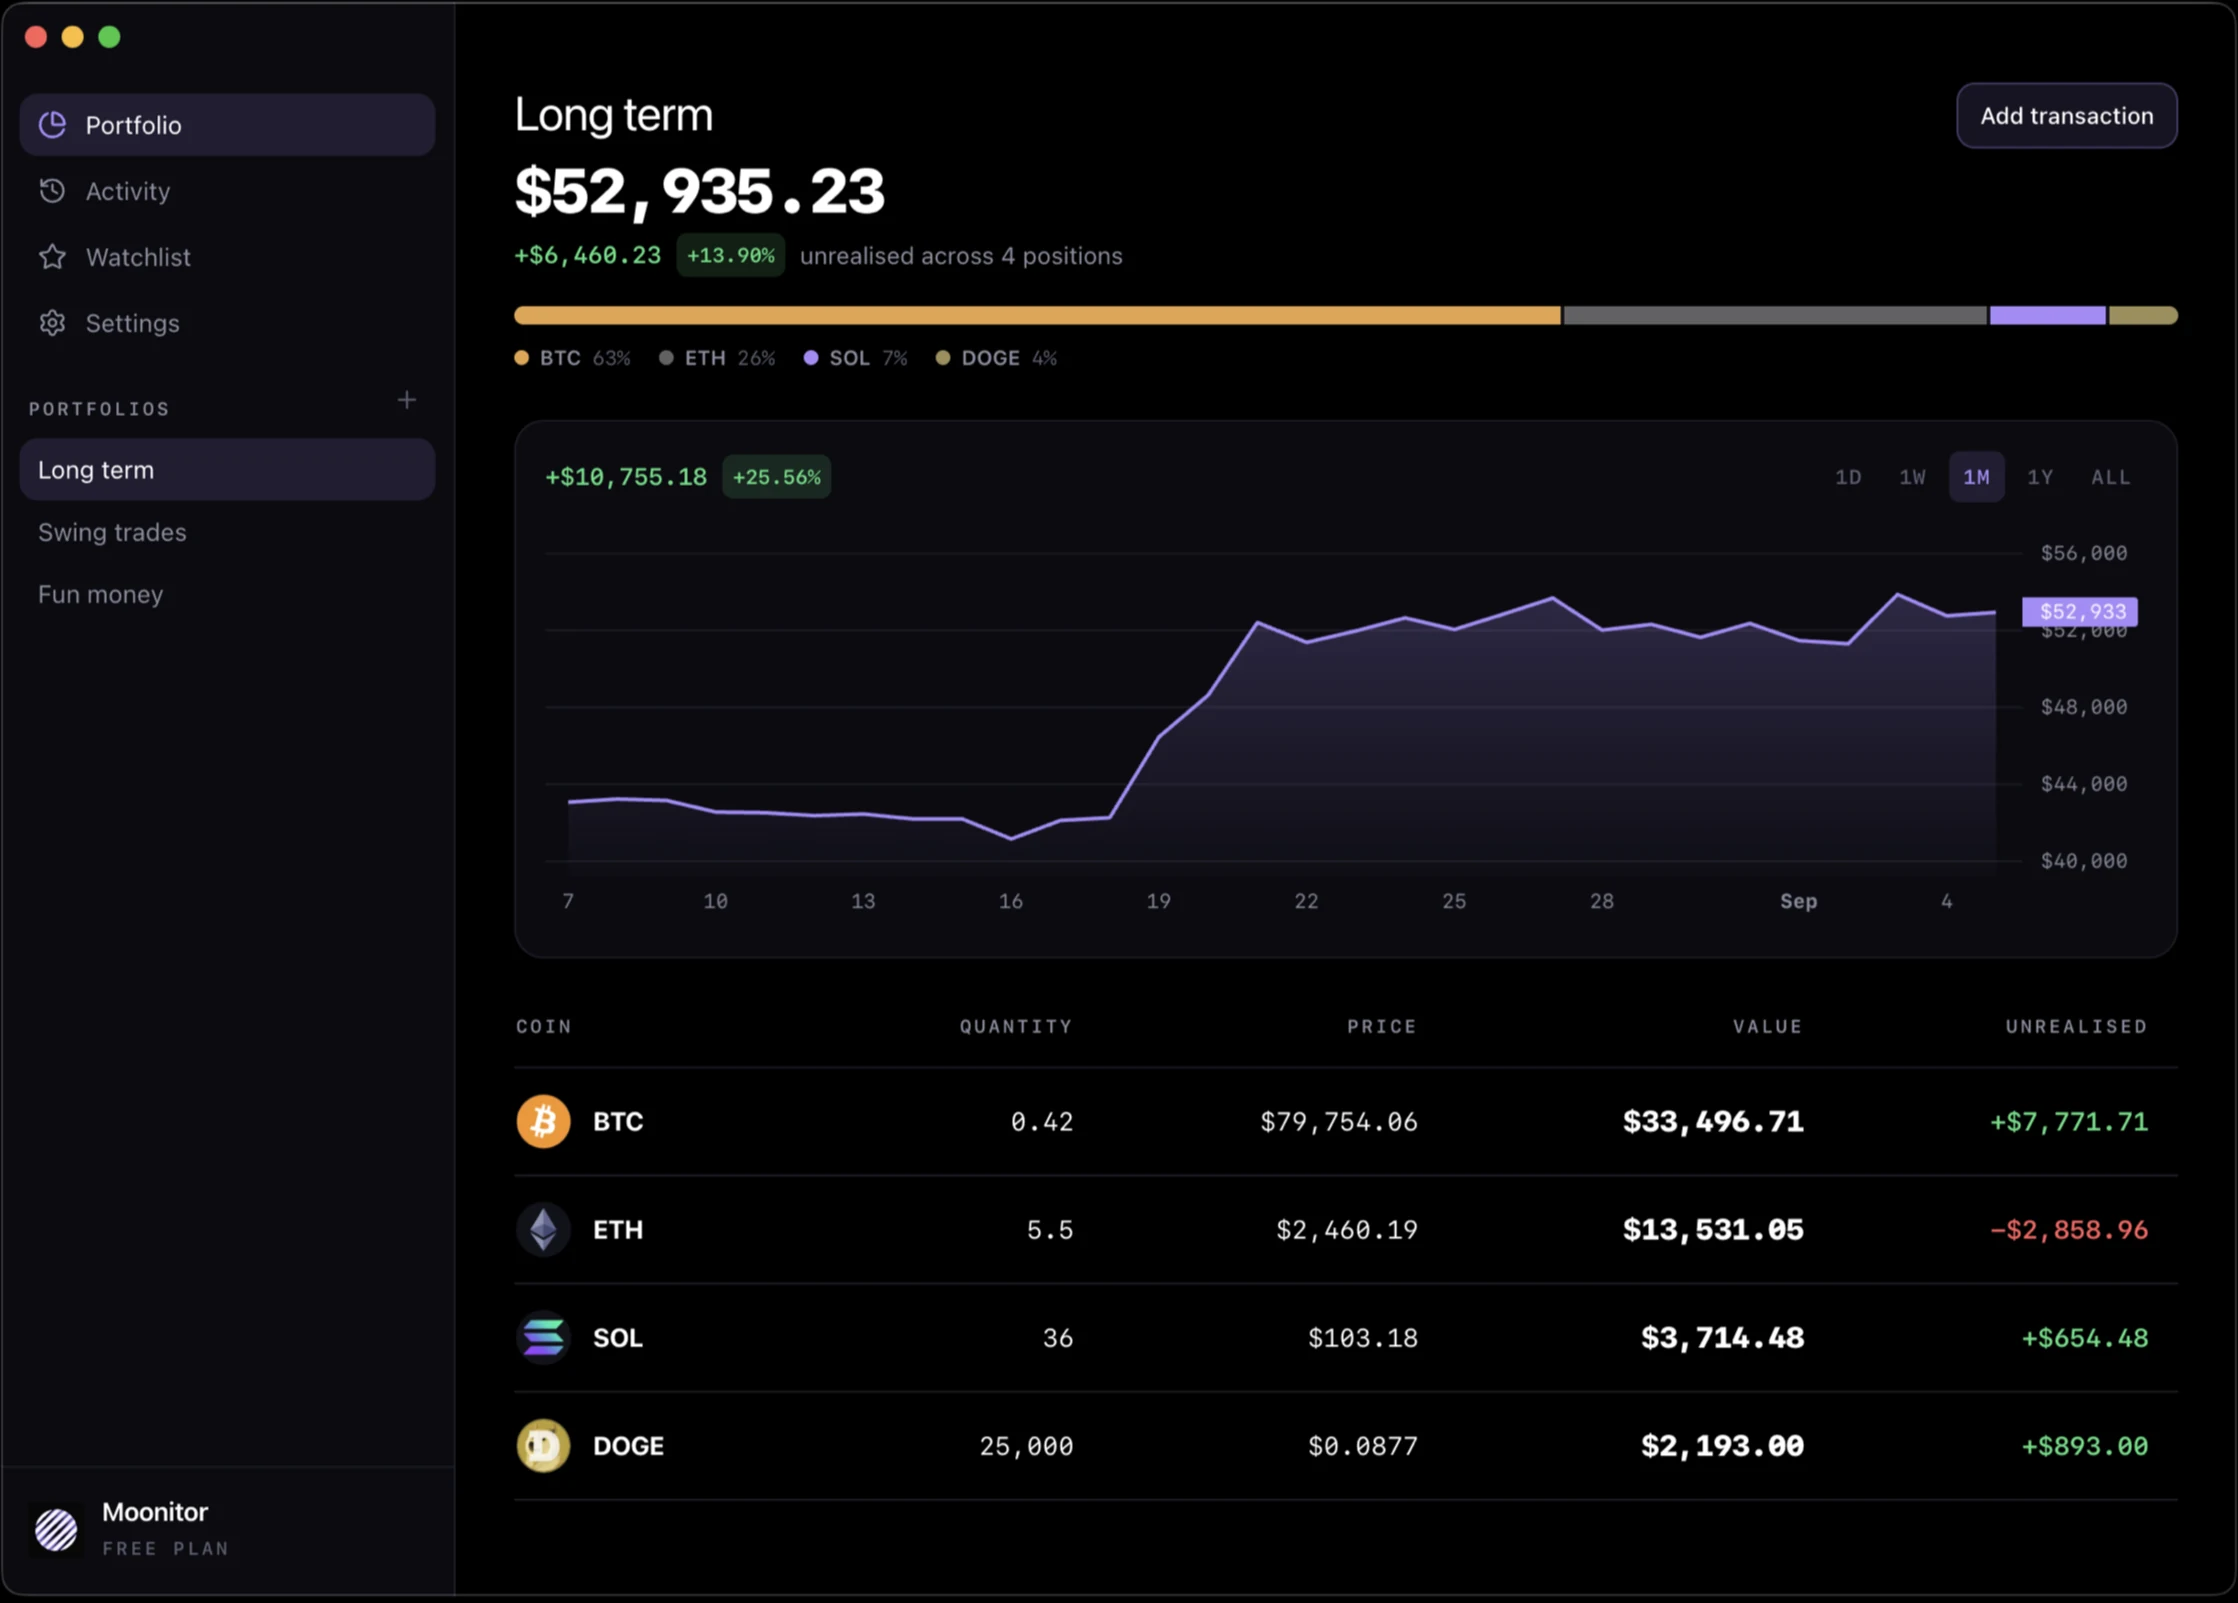
This guide sets up a portfolio in Moonitor on macOS, Windows or Linux. It takes a few minutes and never asks you to log in to an exchange.
Before you start: where the numbers come from
This is the part that surprises people, so it is worth saying first.
Moonitor never connects to your exchange account. There is no API key field, no login screen, no wallet address to paste. The app reads public prices from exchanges, and you tell it what you hold. It multiplies the two.
That means two things:
- You type in your own holdings and they are stored on your own machine. Nobody, including us, can see them.
- Balances do not appear by themselves. If you buy on an exchange, you record that purchase in Moonitor too.
If automatic syncing matters more to you than privacy, Moonitor is the wrong tool and you want a tracker that takes read-only API keys. If you would rather not hand your balance history to a stranger, keep reading. There is more on this in crypto portfolio tracker without API keys.
Step 1: install the app
Download Moonitor for your platform from moonitor.io. There are builds for:
- macOS 12 or later, Apple Silicon and Intel, from the Mac App Store, from Setapp, or as a direct download
- Windows 10 or later, as an installer or an MSI
- Linux, as a .deb, an .rpm or an AppImage
The app is free. You can track up to 5 coins, keep 1 portfolio, follow 10 markets on the watchlist and set 1 price alert without paying anything. Transactions are never limited, on any plan.
Step 2: add a coin
Open Portfolio and choose Add transaction. Pick the coin you hold.
Because a coin's price is always the price on some exchange, Moonitor asks which one. If you bought BTC on Kraken, pick Kraken. If you have no strong opinion, the largest exchange listing that coin is a safe answer.
The choice is not permanent, and it is not hidden. Settings has a Pricing section listing every coin you hold and the market it is priced from, and you can change any of them later.
Two small things worth getting right now:
- The quote currency matters. BTC/USD on Coinbase and BTC/USDT on Binance are close, but they are different pairs. If you think in euros, look for a real euro pair rather than a dollar one that gets converted.
- The exchange should be one that actually trades your coin. A thinly traded pair gives you a price that jumps around.
Step 3: record what you bought
Now enter the transaction itself: how much, at what price, on what date, and any fee.
The date is not decoration. Moonitor uses it to draw the value of your portfolio over time, and to work out which purchases are still open. A rough date is much better than today's date on an old purchase.
You can record four kinds of thing:
- Buy and Sell, with a price
- Transfer in and Transfer out, for coins that moved without being traded
Recording transfers matters. A coin you were given, or moved off an exchange, changes what you hold without being a purchase, and treating it as one would throw your profit off.
Step 4: read what it tells you
Once a coin is in, the Portfolio screen shows a row for it: how much you have, what it costs today, what it is worth, and whether you are up or down.
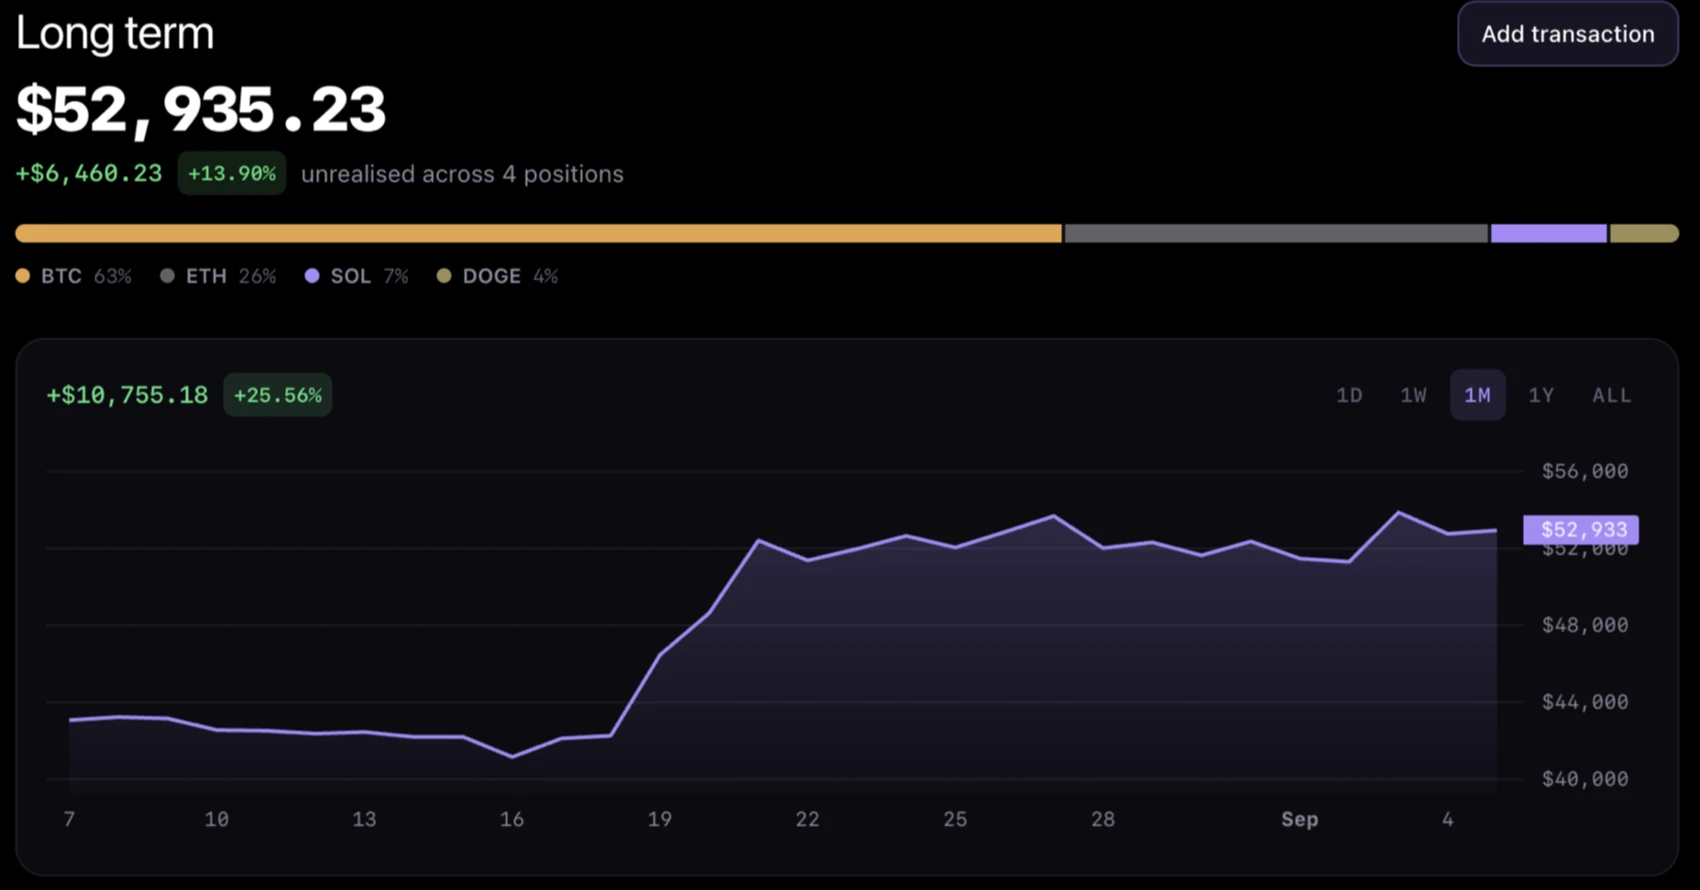
Above the table are the three numbers most worth knowing:
- The total. What everything is worth right now, in your portfolio's currency.
- The allocation bar. How the total splits between coins. This is the one people are most often wrong about.
- The chart. What the portfolio was worth over the last day, week, month, year, or all of it.
The chart is worth one extra sentence, because most trackers get it wrong. It values what you actually held on each day, so the line matches the figures next to it. And the percentage beside it is your real return: money you added part way through counts as money added, not as performance. A simple first-to-last calculation reports a mid-month deposit as a gain, which is flattering and useless.
Step 5: open a coin
Click a coin to see it on its own: a chart with a dotted line at the price you paid on average, your position underneath, and every transaction on that coin.
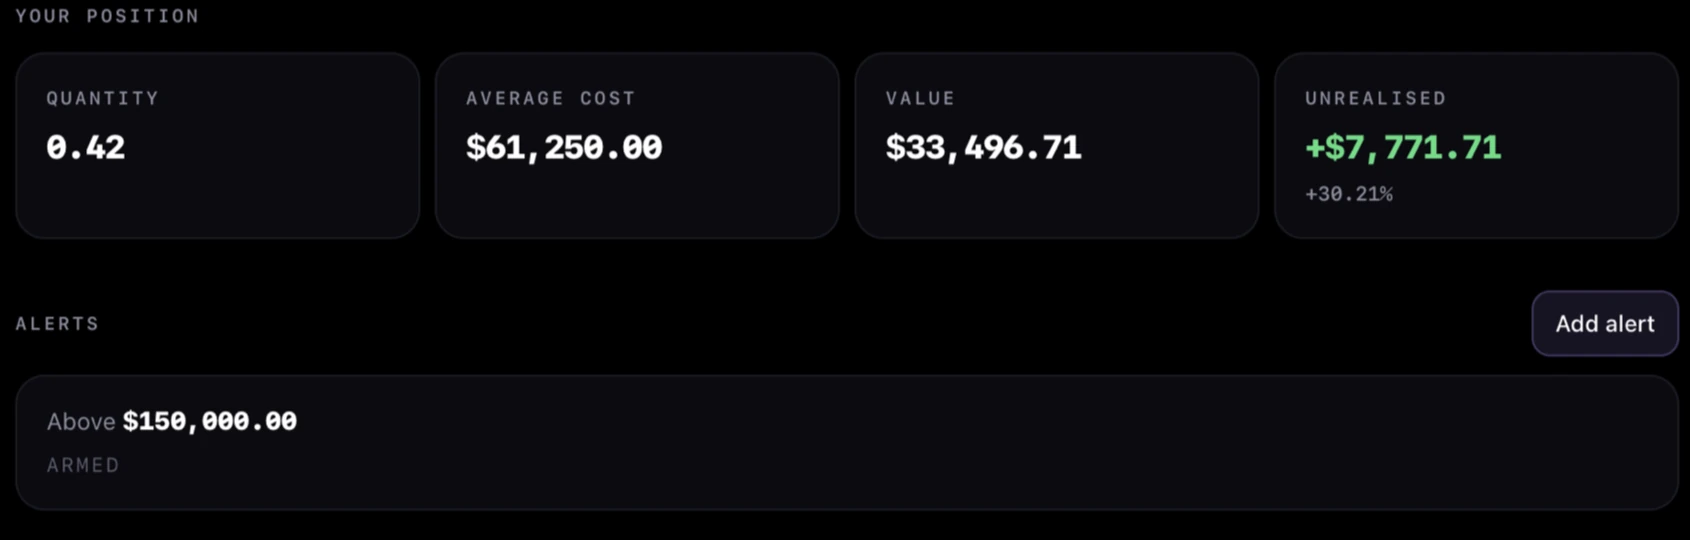
This is also where you set a price alert. Choose above or below, type a number, and Moonitor watches that market for you. While the app is open, you get a notification the moment the price crosses your line. Leave the window open on a second monitor and it will tell you.
Desktop alerts only fire while the app is running. If you want alerts that arrive when the app is closed, that is what Moonitor for iPhone does.
Step 6: follow coins you do not own
The Watchlist is for coins you are thinking about rather than ones you hold. Add a market, and it sits in a list with a live price, the day's change and a small price line.
The watchlist belongs to you rather than to a portfolio, so switching portfolio or deleting one leaves it alone. You can sort by biggest gain, biggest fall, or drag the rows into whatever order you like.
Step 7: keep it safe, and keep it in step
Everything lives on this machine, so it is worth deciding how it gets to your other ones.
- iCloud. If you installed from the Mac App Store, turn on iCloud sync and your Mac and your iPhone keep each other up to date through your own private container.
- A folder you already sync. Point Moonitor at a folder inside Dropbox, OneDrive, Google Drive or Syncthing, and every device watching that folder stays in step. If two machines are edited at once, the two versions are merged rather than one overwriting the other.
- A file. Settings can export the whole thing to a backup file, and import one back.
What next
- How to track crypto profit and loss explains what the numbers mean and how to record trades so they stay right
- Supported exchanges covers all 16, and how to change where a coin gets its price
- Crypto portfolio tracker without API keys is the longer argument for doing it this way
